NSEarchをインストールして使ってみましたよ
ポートスキャナ「Nmap」には、NSE(Nmap Scripting Engine)http://nmap.org/book/man-nse.htmlというものが付属しています。NSEは様々な処理を自動化したスクリプトでサービスの設定を確認するものや脆弱性が存在するかどうかをチェックするようなものなど多種多様で、自分自身で記述することも可能です。
今回はこのNSEを検索するためのツール「NSEarch」をKali Linux 1.1.0にインストールして使ってみました。
【NSEarchをダウンロード】
git clone https://github.com/JKO/nsearch.git
【設定に必要なNSEが保存されているPathを取得】
find /usr -type f -name “script.db” 2>/dev/null | awk ‘gsub(“script.db”,””)’
/usr/share/nmap/scripts/
【設定ファイルの編集】
cd nsearch
cp config.yaml.example config.yaml
vi config.yaml
(設定ファイル編集前)
#Configuration File
config:
scriptsPath: “/usr/local/share/nmap/scripts/”
filePath: “/usr/local/share/nmap/scripts/script.db”
fileBackup: ‘scriptbk.db’
scriptdb: “nmap_scripts.sqlite3”
categories: [“auth”,”broadcast”,”brute”,”default”,”discovery”,”dos”,”exploit”,”external”,”fuzzer”,”intrusive”,”malware”,”safe”,”version”,”vuln”]
(設定ファイル編集後)
#Configuration File
config:
scriptsPath: “/usr/share/nmap/scripts/”
filePath: “/usr/share/nmap/scripts/script.db”
fileBackup: ‘scriptbk.db’
scriptdb: “nmap_scripts.sqlite3”
categories: [“auth”,”broadcast”,”brute”,”default”,”discovery”,”dos”,”exploit”,”external”,”fuzzer”,”intrusive”,”malware”,”safe”,”version”,”vuln”]
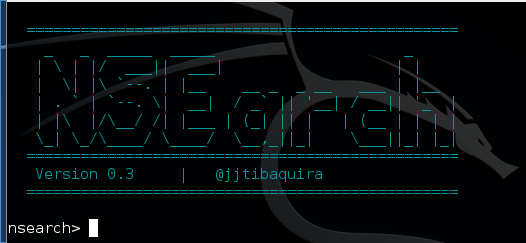
【NSEarchを実行】
python nsearch.py
================================================
_ _ _____ _____ _
| \ | |/ ___|| ___| | |
| \| |\ `–. | |__ __ _ _ __ ___ | |__
| . ` | `–. \| __| / _` || ‘__| / __|| ‘_ \
| |\ |/\__/ /| |___ | (_| || | | (__ | | | |
\_| \_/\____/ \____/ \__,_||_| \___||_| |_|
================================================
Version 0.3 | @jjtibaquira
================================================Creating Database :nmap_scripts.sqlite3
Creating Table For Script ….
Creating Table for Categories ….
Creating Table for Scripts per Category ….
Upload Categories to Categories Table …================================================
_ _ _____ _____ _
| \ | |/ ___|| ___| | |
| \| |\ `–. | |__ __ _ _ __ ___ | |__
| . ` | `–. \| __| / _` || ‘__| / __|| ‘_ |
| |\ |/\__/ /| |___ | (_| || | | (__ | | | |
\_| \_/\____/ \____/ \__,_||_| \___||_| |_|
================================================
Version 0.3 | @jjtibaquira
================================================nsearch>
【helpを表示】
nsearch> help
Nsearch Commands
================
clear doc exit help history last search
【各コマンドのhelpを表示】
nsearch> help clear
Clear the shellnsearch> help doc
Usage:
docnsearch> help exit
Exits from the consolensearch> help history
Print a list of commands that have been enterednsearch> help last
Print the last Result of the Querynsearch> help search
name : Search by script’s name
category : Search by category
Usage:
search name:http
search category:exploit
【基本的な使い方】
基本的には[search]コマンドを用いてNSEを探すことになるかと思います。
Version 0.3での検索の方法は[name]と[category]が用意されています。
[name]では指定した文字列を含んでいるNSEが列挙されます。
また、[category]では「NSEarch」の設定ファイルに定義されているカテゴリーにマッチするものを列挙されます。
Version 0.3 では「auth」「broadcast」「brute”」「default」「discovery」「dos」「exploit”」「external」「fuzzer」「intrusive」「malware」「safe」「version」「vuln」が定義されています。
以下は[name]で[ntp]、[category]で[auth]で[search]コマンドを実行したログです。
nsearch> search name:ntp
1.http-frontpage-login.nse
2.ntp-info.nse
3.ntp-monlist.nse
nsearch> search category:auth
1.ajp-auth.nse
2.creds-summary.nse
3.domcon-cmd.nse
4.domino-enum-users.nse
5.ftp-anon.nse
6.http-auth.nse
——– SNIP ——–
29.sip-enum-users.nse
30.smb-enum-users.nse
31.smtp-enum-users.nse
32.snmp-win32-users.nse
33.x11-access.nse
また、[doc]コマンドを用いることで指定したNSEを見ることができます。
nsearch> doc ntp-info.nse
local bin = require “bin”
local comm = require “comm”
local nmap = require “nmap”
local shortport = require “shortport”
local stdnse = require “stdnse”
local string = require “string”
local table = require “table”description = [[
Gets the time and configuration variables from an NTP server. We send two
requests: a time request and a “read variables” (opcode 2) control message.
Without verbosity, the script shows the time and the value of the
—- SNIP —-
author = “Richard Sammet”
誤った文字列を指定するとエラーメッセージではなく終了してしまったり、NSEによっては[doc]コマンドの結果が正しく表示されなかったりという荒削り感はありますがその辺りは今後のバージョンアップに期待です。